Powdered Panels
- Feb 14, 2022
- 4 min read
Updated: Sep 28, 2023
Just about any electronics hobbyist has wanted to make a panel for some sort of machine or device at some point. It seems like every few months I need to make one or more. While there are lots of ways to go about it, I have never been happy with them. In particular, creating a professional looking panel with good looking labels has been a challenge for me. Based what I have seen from others, I am not alone.
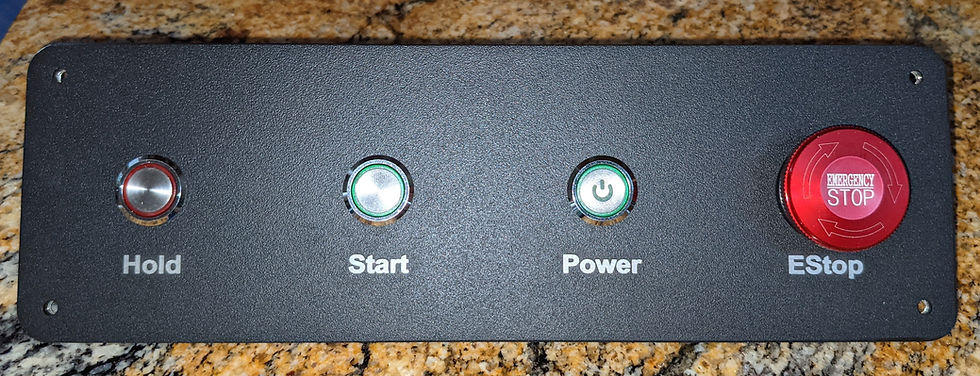
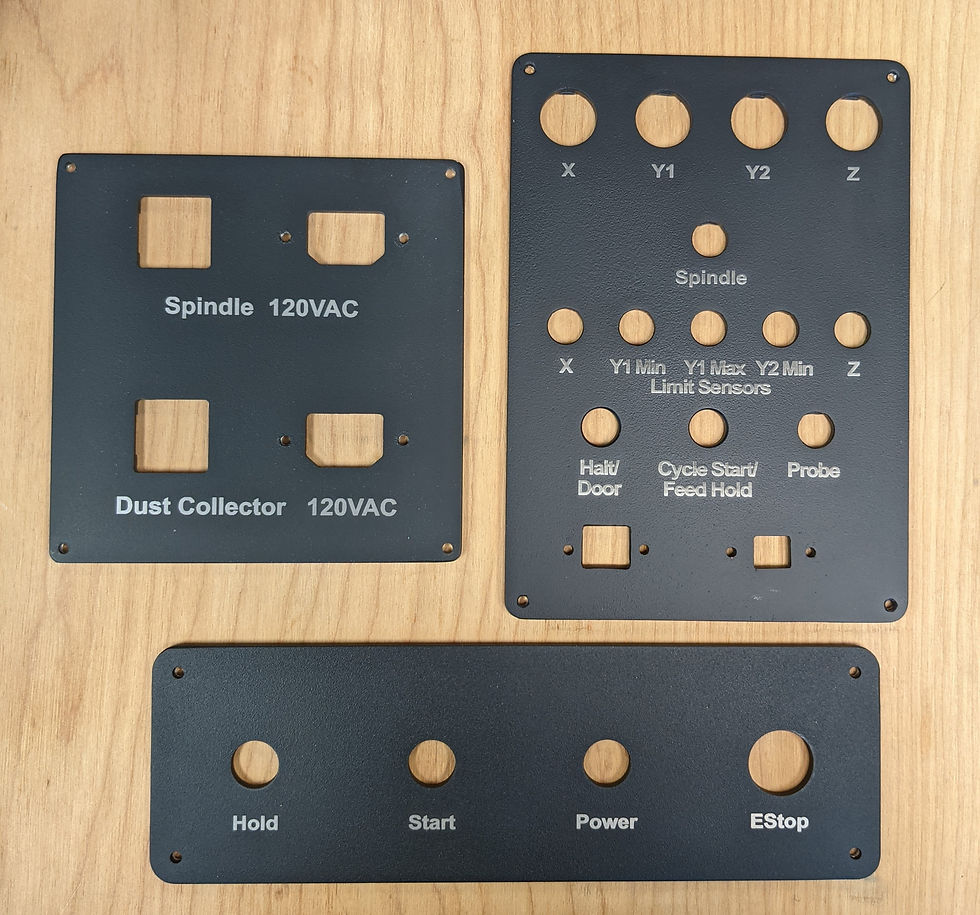
Recently, I needed to make several panels for a new CNC machine based on my grblHAL breakout board. Two are for the electronics cabinet and a smaller one for the front of the machine to hold some buttons and a prominent EStop switch. I decided to make them out of aluminum. Cutting them on my CNC machine was relatively straightforward but I struggled with how to label them.

You can buy marking fluid that you laser to get fairly dark labels on bare aluminum. This was my plan but a tiny bottle of that was almost $100 with tax and shipping and I was not overly impressed with the quality. It is not terrible but not heart stopping on the other end, either. If you have anodized aluminum, you can use a laser to make labels by burning off the dye. Of course I had to get them anodized or do it myself. While anodizing is well within scope of a skilled hobbyist, I didn't want to deal with the chemicals and it was hard to find a local outfit that would anodize my 3 little panels. But then I hit on doing something similar with powder coated metal.
The more I read about that, the better it sounded. Lot of colors and texture options. One stopping block - getting the panels powder coated. I found several places that would do it for me but they wanted $250 or more for 3 little panels. Reading further, it turns out powder coating is actually fairly easy to do. The key is a "power supply" that generates 25K volts. You clip the negative output to your metal work piece and the positive to a powder spray gun. Using very low pressure (6-10 psi), the gun distributes the powder with a positive charge which is attracted to the negatively charged metal work piece and forms a fairly uniform layer. You then bake the work piece at 400F/204C for 20 minutes. In the end, you get a super durable coating. Unlike painting, if you make a mistake you just blow the powder off and start over. And because it is essentially dust, it makes for a very uniform layer. Shopping around I found an inexpensive powder set up. Including the gun, power supply and several powders, the price tag came to less than $200. Sold! I have a compressor and a $10 toaster oven from the thrift store completed my setup.
With some trepidation, I did a test piece. Coating it with powder was easy. I gently slipped it into my pre-heated toaster oven. Within a minute, the dull powder turned glossy. That is the point where you start the timer for 20 minutes. After a minute or two, it "flowed" and became a uniform looking surface. Twenty minutes later I pulled it out and let it cool. WOW, it was amazing how good it turned out. But, the big test was yet to come - etching the labels into the powder coat.
I took my test piece into our local makerspace (North End Makerspace in Seattle) armed with some test vectors and spent a couple hours trying different settings. After some tweaking, I dialed in a process that looked pretty good. I struggled with the laser software (Retina Engrave) to get a good raster engraving but finally got it sorted out. As you can see, I tried several different approaches.

So back to powder coating, I coated my 3 panels and baked them. They came out pretty good. And then back again to NEMS to vaporize a bunch of powder. I did make a couple of mistakes, see below for a discussion. But overall, I think they came out great.
Being an engineer at heart, I always evaluate my efforts and think about how I can improve the process. The number one mistake I made was trying to etch the powder in one pass. This generates more heat and causes some of the vaporized powder to settle on the recently etched areas, thus making it look a little dingy. I missed it on the test panel because I only etched a small amount. I didn't realize this was happening and took the first panel off the laser etcher. For the second and third panel, I went to a 2 pass scheme. First pass was about 60% power and the second was about half power. They came out very sharp.
What's next? In researching powder coated and etched labels, I ran across people that are applying two powder coats of different colors and then etching off the top layer to expose the bottom one, Imagine black on top of yellow etched to show the yellow. I'm going to experiment with that. I believe it will take very careful control of the laser's power. Another thing I want to try is coating a piece with powder and then use a laser to fuse the powder to the metal. Blow the unfused powder off and bake to cure the fused powder. Some what similar to how a laser printer works.
About Me
I'm a CNC enthusiast. I run a small company, Brookwood Design, that makes several Breakout Boards for grblHAL and love to help people get the most out of their CNC machines.


Comments