Wedding Projects
My daughter got married this past weekend. I made a number of things for the wedding on my Avid Pro4848 powered by a T41U5XBB running grblHAL. The items were: a welcome sandwich board (40"x30"), a large table assignment board for 110 people (48"x36"), and table numbers (5" high) for 12 tables. The sandwich board had a 24"x6"x9" flower box, and the table assignment board had 3 small flower boxes. It was a big project and took about 10 days total, though CNC machine time was only about 3 hours. Along the way, I had several problems, including a flaky connector on one of my stepper drivers and the world's worst paint for filling in the carved areas. I used VCarve from Vectric for the project.
We selected Baltic birch 9mm plywood as a compromise between sturdiness and weight. I prefinished all the pieces with shellac sanding sealer and light stain. I really do not like staining wood - it seems to have a mind of its own, and I spent way too much time fussing to get it right.
I tackled the table numbers first. I arranged them (12) in a 3x4 array. Each number was 5"x5", so the workpiece was a bit larger than 20"x15". Since the numbers had to be on both sides, it was a double-sided project. The sequence of operations was:
Place Oramask masking on both top and bottom of the workpiece and mount it on the machine.
VCarve the bottom numbers.
Drill the bottom registration holes in the workpiece (for aligning after the flip).
Drill the flipped top registration holes in the spoilboard.
Insert the registration pegs in the workpiece, flip the workpiece, and insert into the top registration holes.
VCarve the top numbers.
Cut out the individual numbers via an outside profile.


Then I sealed the VCarve sections using shellac and used spray paint to color them. This is where I learned that Rust-Oleum spray paint is terrible for this. Even with two coats of shellac as a sealer, I got wicking. Ugh. It was so bad that I had to redo them.

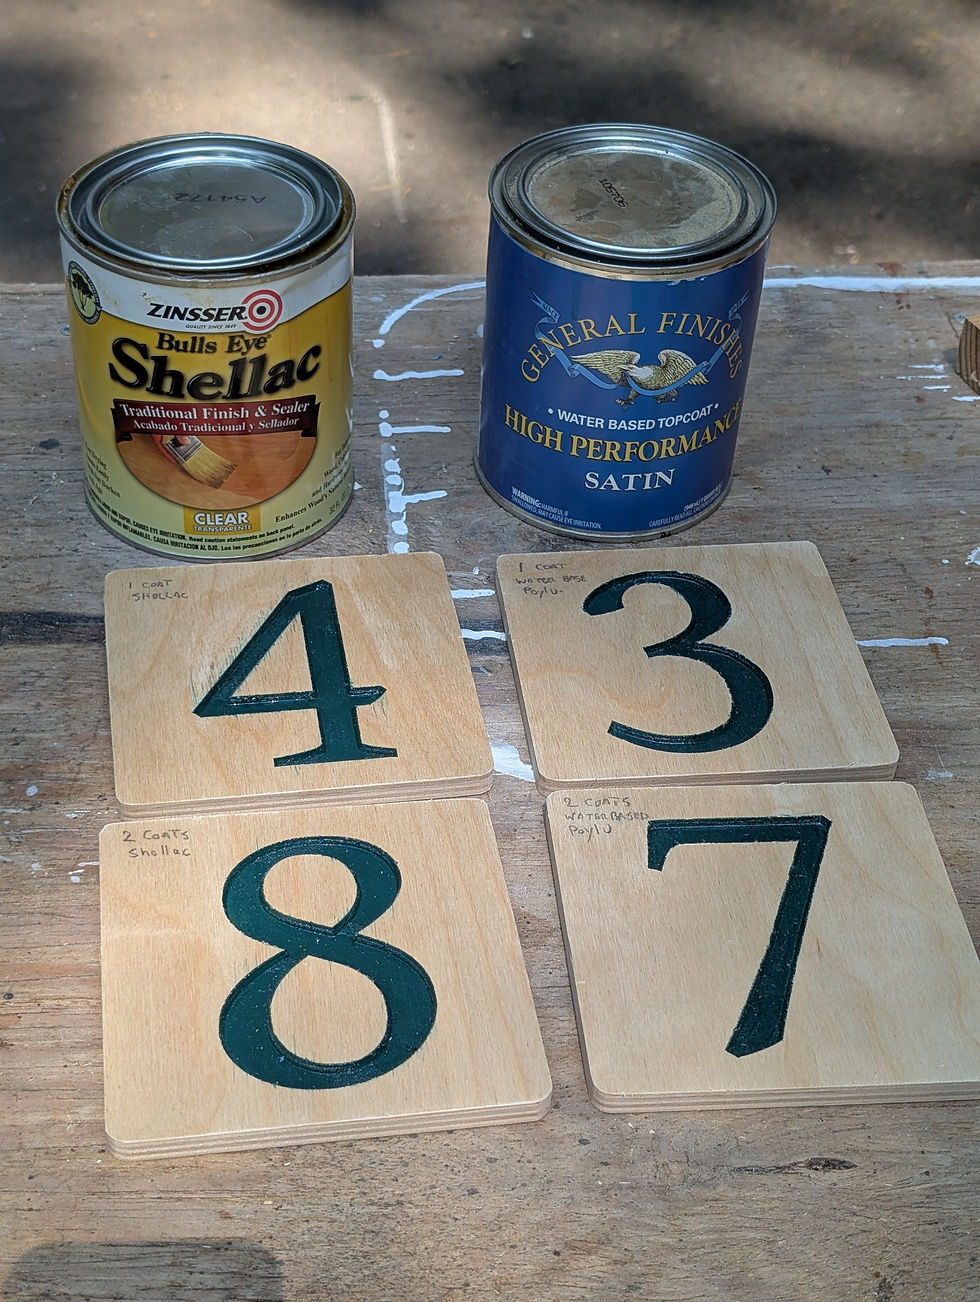
I experimented using 1 and 2 coats of shellac as a sealer, as well as 1 and 2 coats of water-based polyurethane clear coat as a sealer. I got better results with the polyurethane but still had some wicking. Then, I tried a water-based art acrylic paint for the infill and got excellent results. In fact, even without sealing, the acrylic had zero wicking. I theorize that the solvent in the spray paint (MEK?) is so thin and the pigment particles are so small that it pokes through anything.
I also cut out 12 bases with a mortise for each number to sit in. Happy with the results.

Next, on to the table assignment board. This was a pretty big piece to work on and clamping it to be perfectly flat against the spoilboard was basically impossible. This called for height mapping, a feature of ioSender (the GCode Sender I use). See this blog post on Height Mapping for more details. I applied Oramask to the workpiece and clamped it to the spoilboard. With a 3D touch probe and ioSender's height mapping, I created a height map of the area I was going to VCarve. Examining the map showed the surface to have about 0.5mm variation. Not huge but enough to create problems for some the narrower parts of the design. I applied the height map to the GCode and ran the program. It came out pretty good. I then sealed and painted the carved portion. Here is the final product. (note: the names are purposely blurred.)
The table assignments were printed on foam-core poster board and mounted with 1/2" brass standoffs. I used the CNC machine to cut keyholes in the back of the flower boxes, which slip onto screws protruding from the table assignment board. It made for quick assembly during setup for the wedding reception.
Finally, I tackled the welcome sandwich board. Using a similar process to the table assignment board, I height-mapped, carved, sealed, and painted the design. I also did the same for the bride and groom's names on the large flower box that was mounted on the welcome sandwich board.

I think it all came out really well. We got a lot of compliments from the partygoers. (And nobody noticed the bad kerning of the bride and groom's names.)
About Me.

I'm Phil Barrett, a long time CNC enthusiast. I run a small company, Brookwood Design, that makes several breakout boards for grblHAL and love to help people get the most out of their CNC machines.


Comments